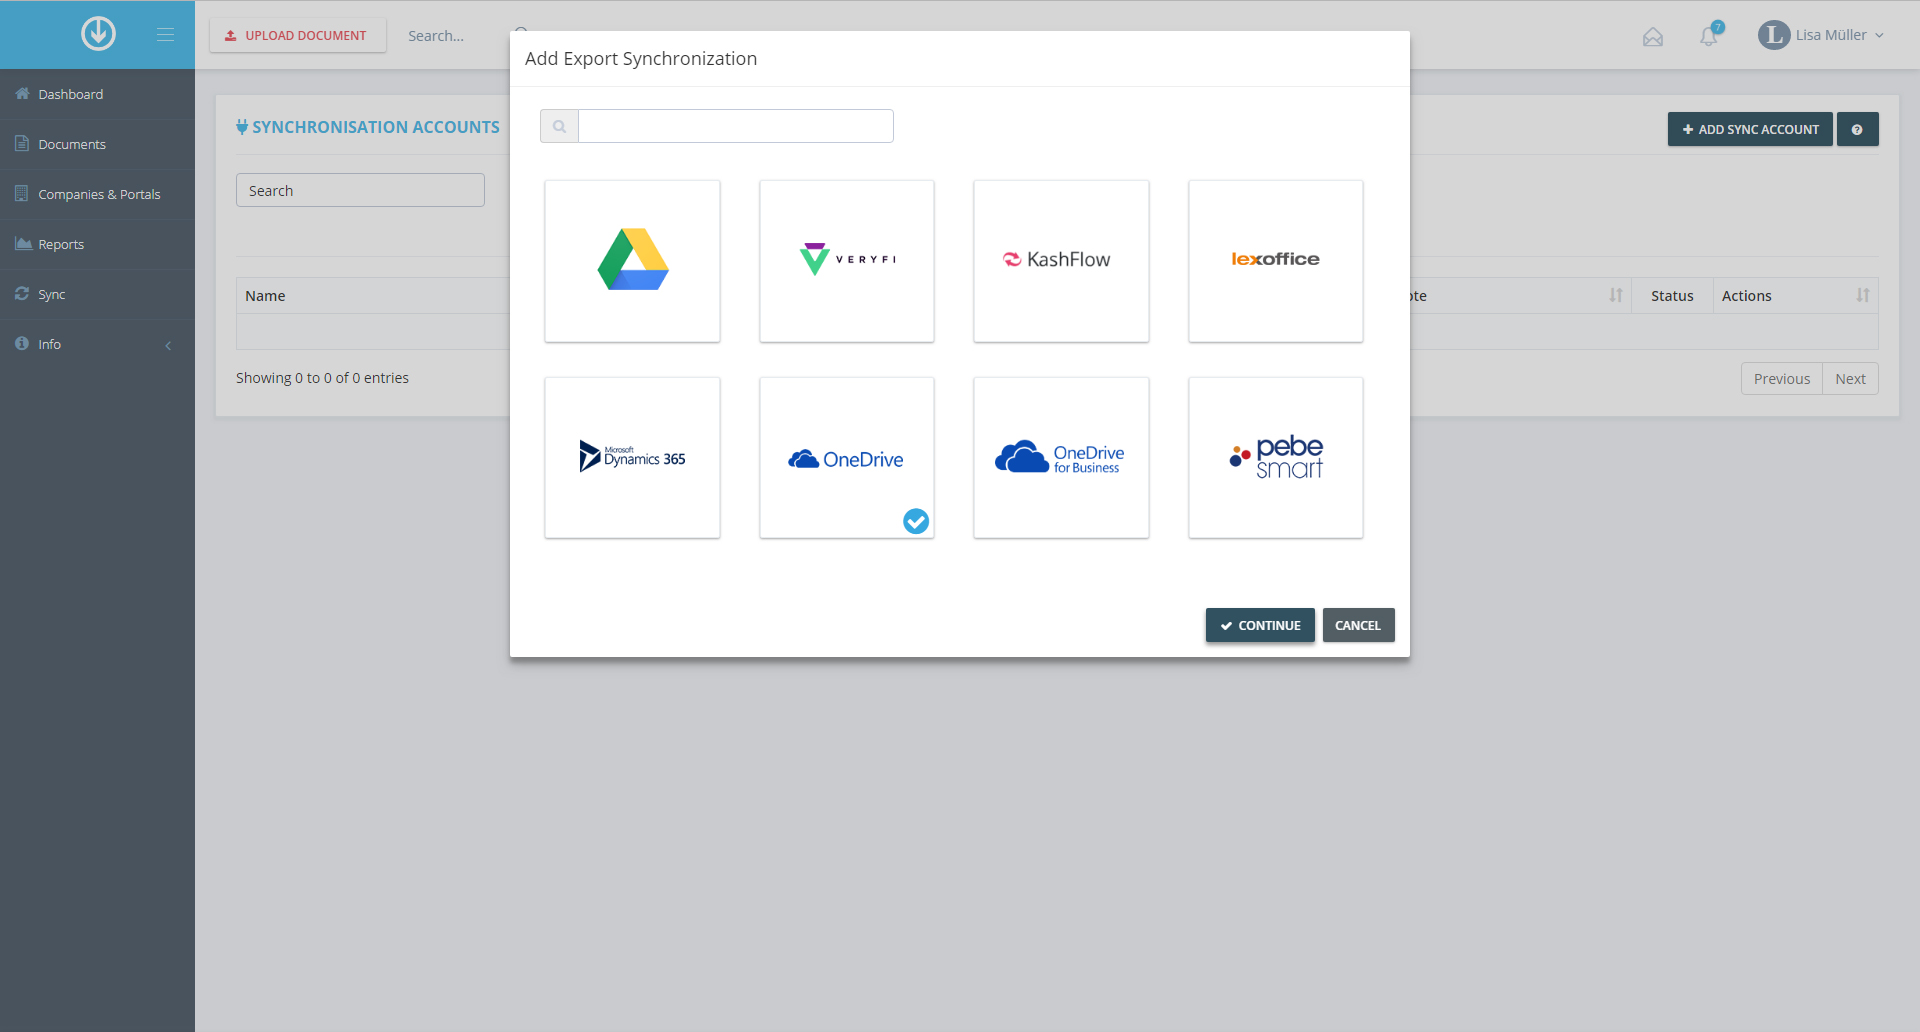
Login to GetMyInvoices > Choose “Synchronization” in the right-hand menu > Click “Add Synchronization Account” > Click “Export” > Choose OneDrive > Click “Continue”!
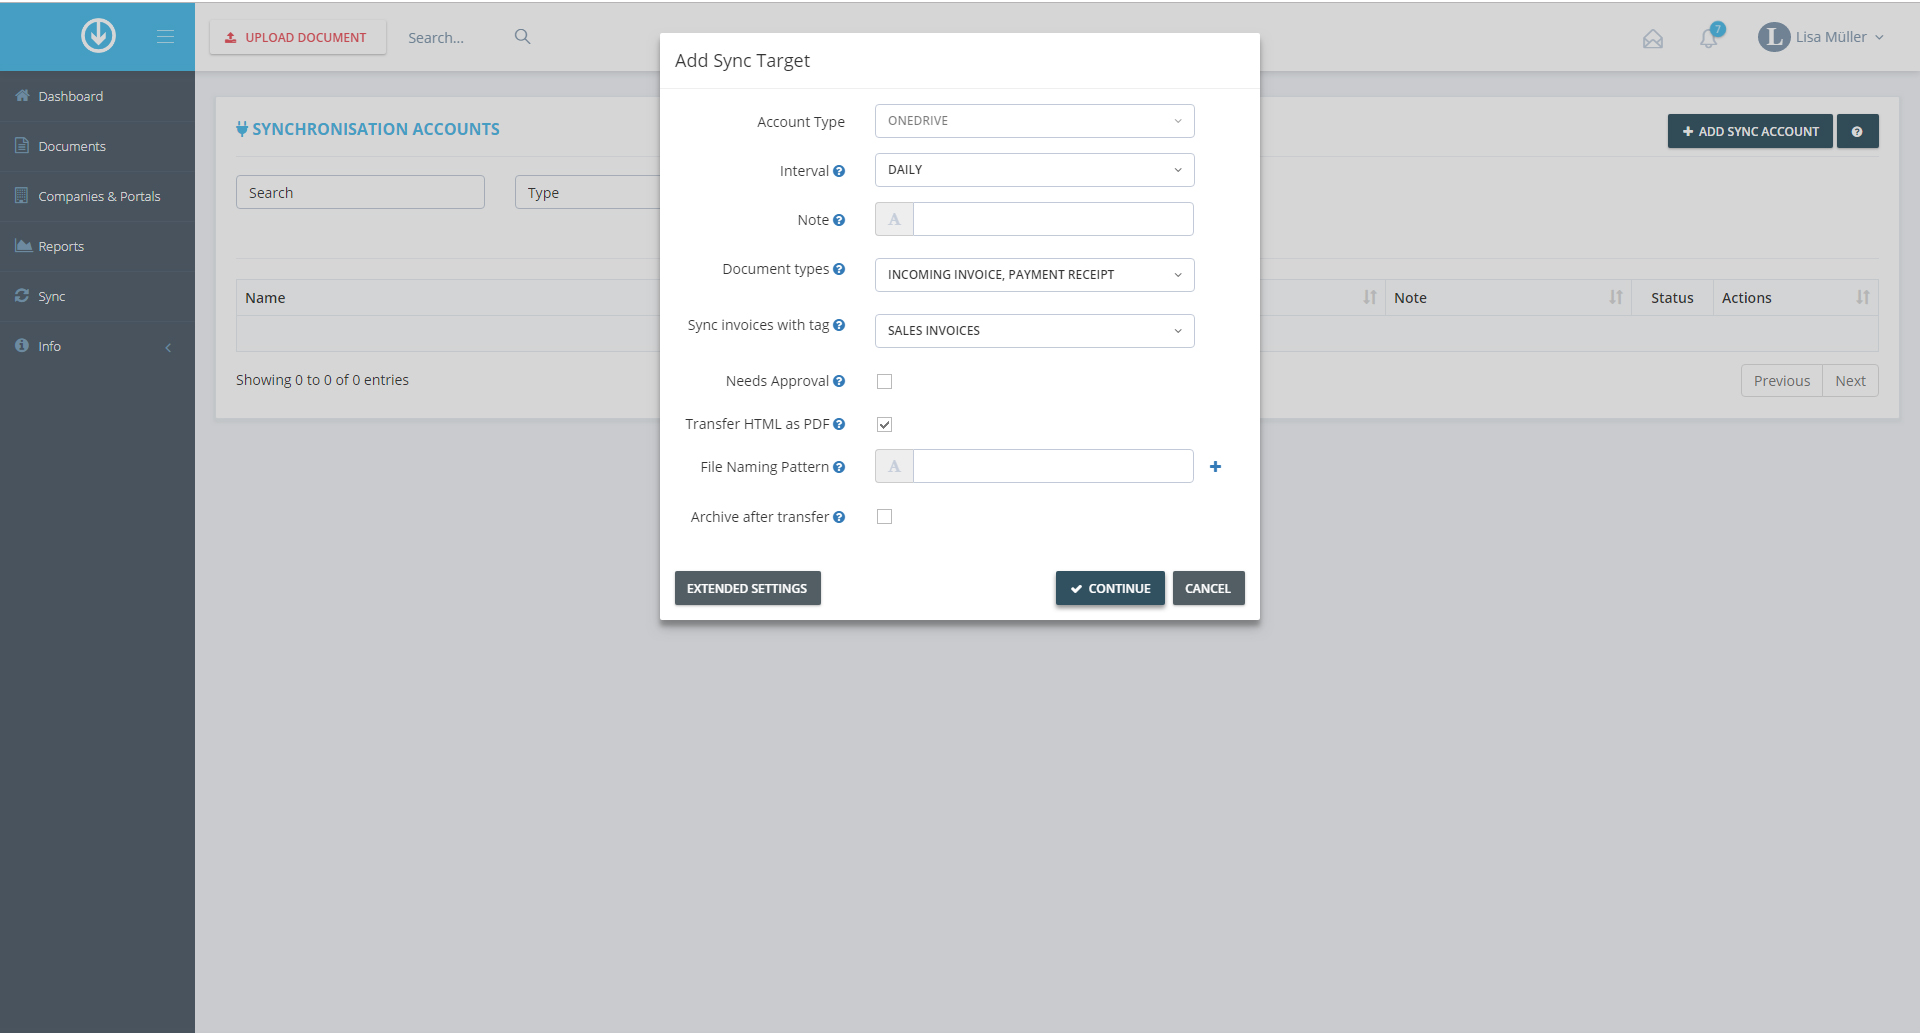
Choose, how often documents should be synchronized > Add a note, if required > Click “Extended Settings” > Specify the export document types and tags, if needed activate the approval field > Decide, whether documents should be archived after the transfer in GetMyInvoices > Click “Continue”!
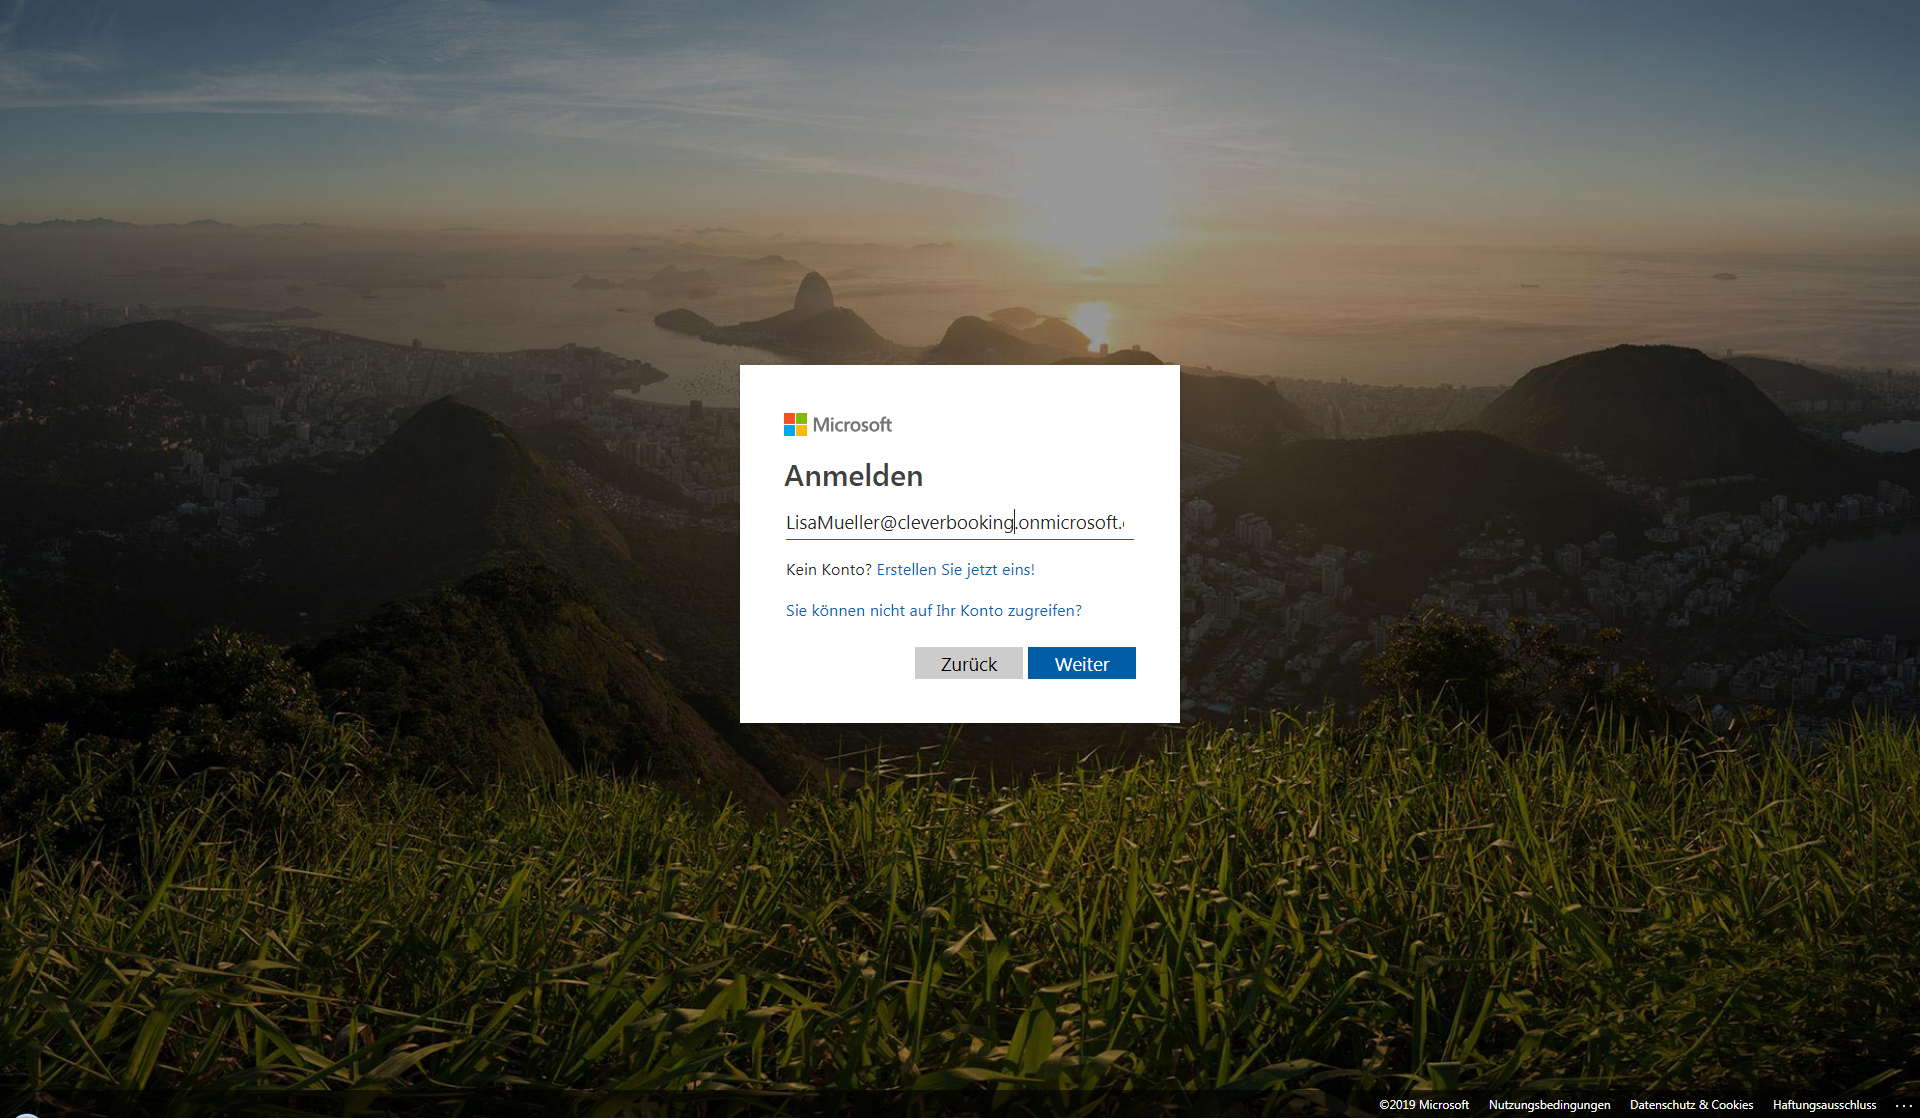
In case the link can’t be followed, temporarily deactivate your anti-virus programme > Login to your OneDrive account, using the pop-up window > Grant GetMyInvoices the listed permissions by clicking “Accept”!
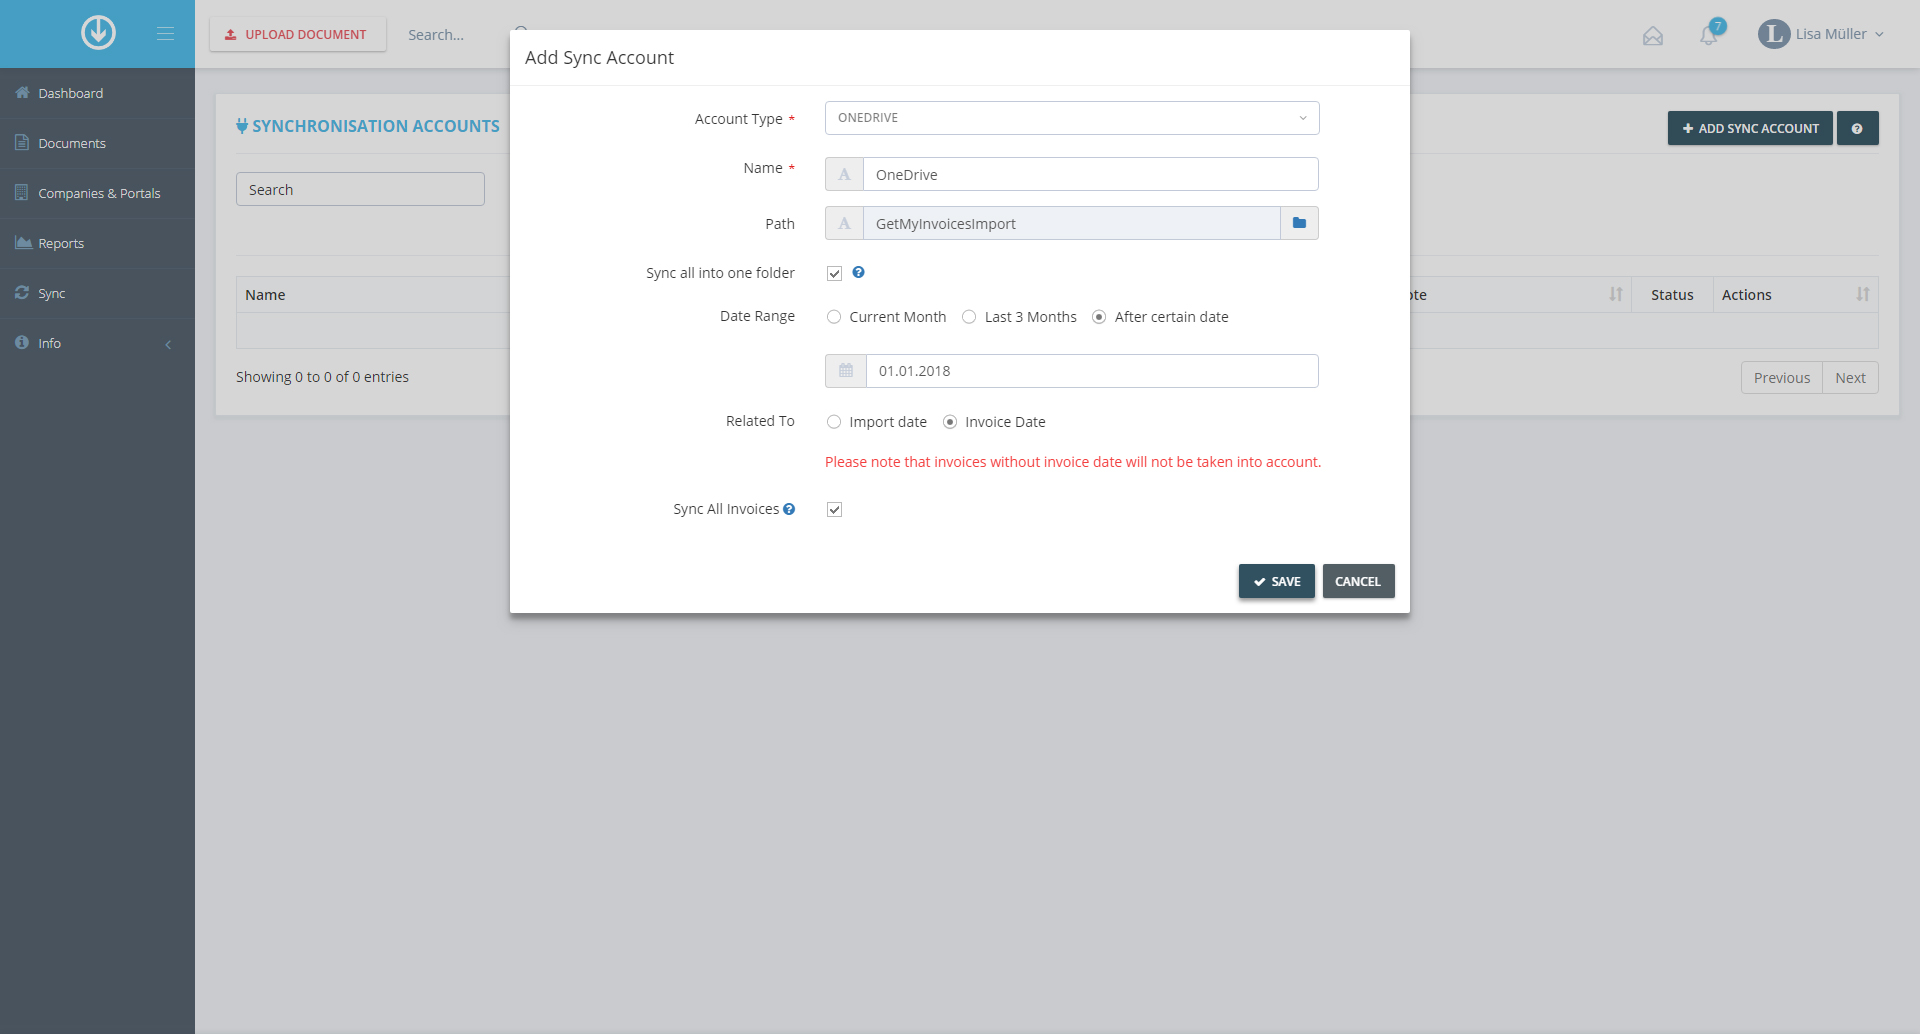
Enter the account type and name > Under “Path”, specify the folder which the documents should be exported to, and click “Continue” > Decide, whether all documents should be synchronized in one folder, or whether you’d like to have subfolders > Define the time period > Click “Save”!
It will only take a short while before you can see the synchronization information in the main menu under “Synchronization”, and a little later you will see the exported documents in OneDrive. That’s it!
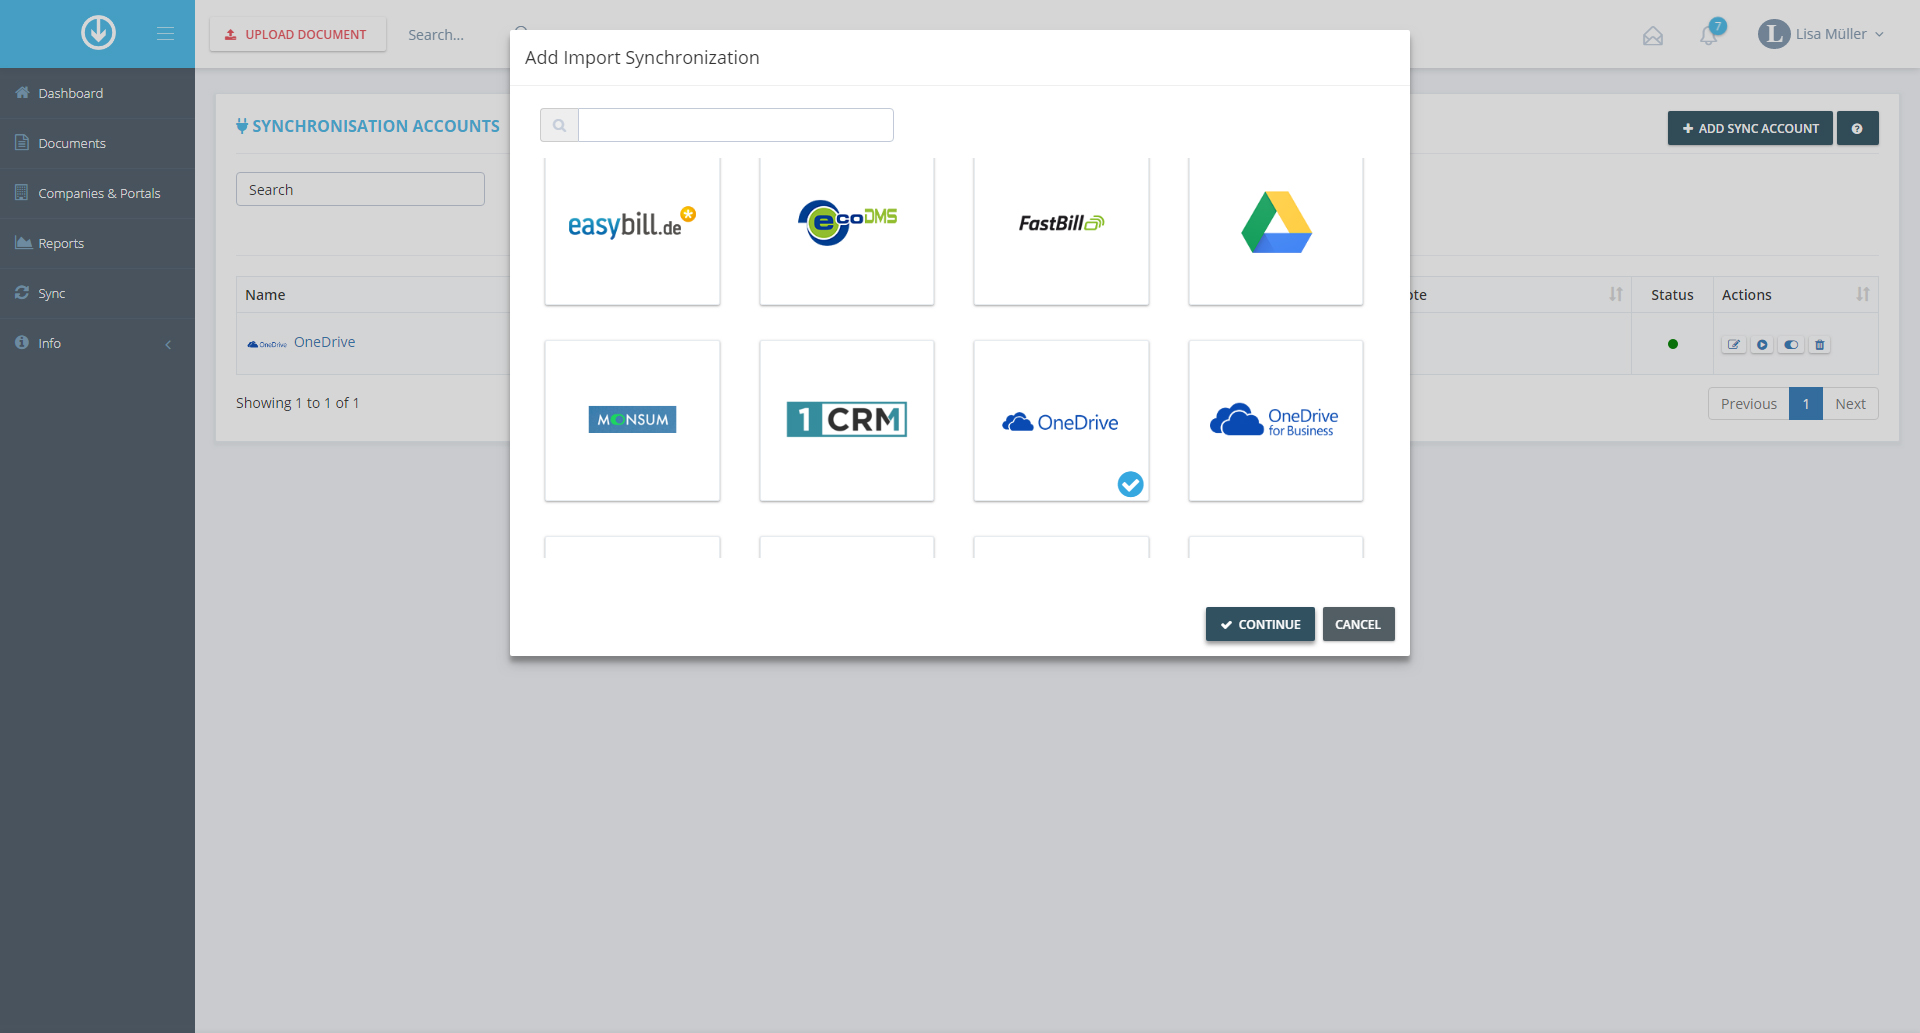
Login to GetMyInvoices > Choose “Synchronization” in the right-hand menu > Click “Add Synchronization Account” > Click “Import”! > Choose OneDrive > Click “Continue”!
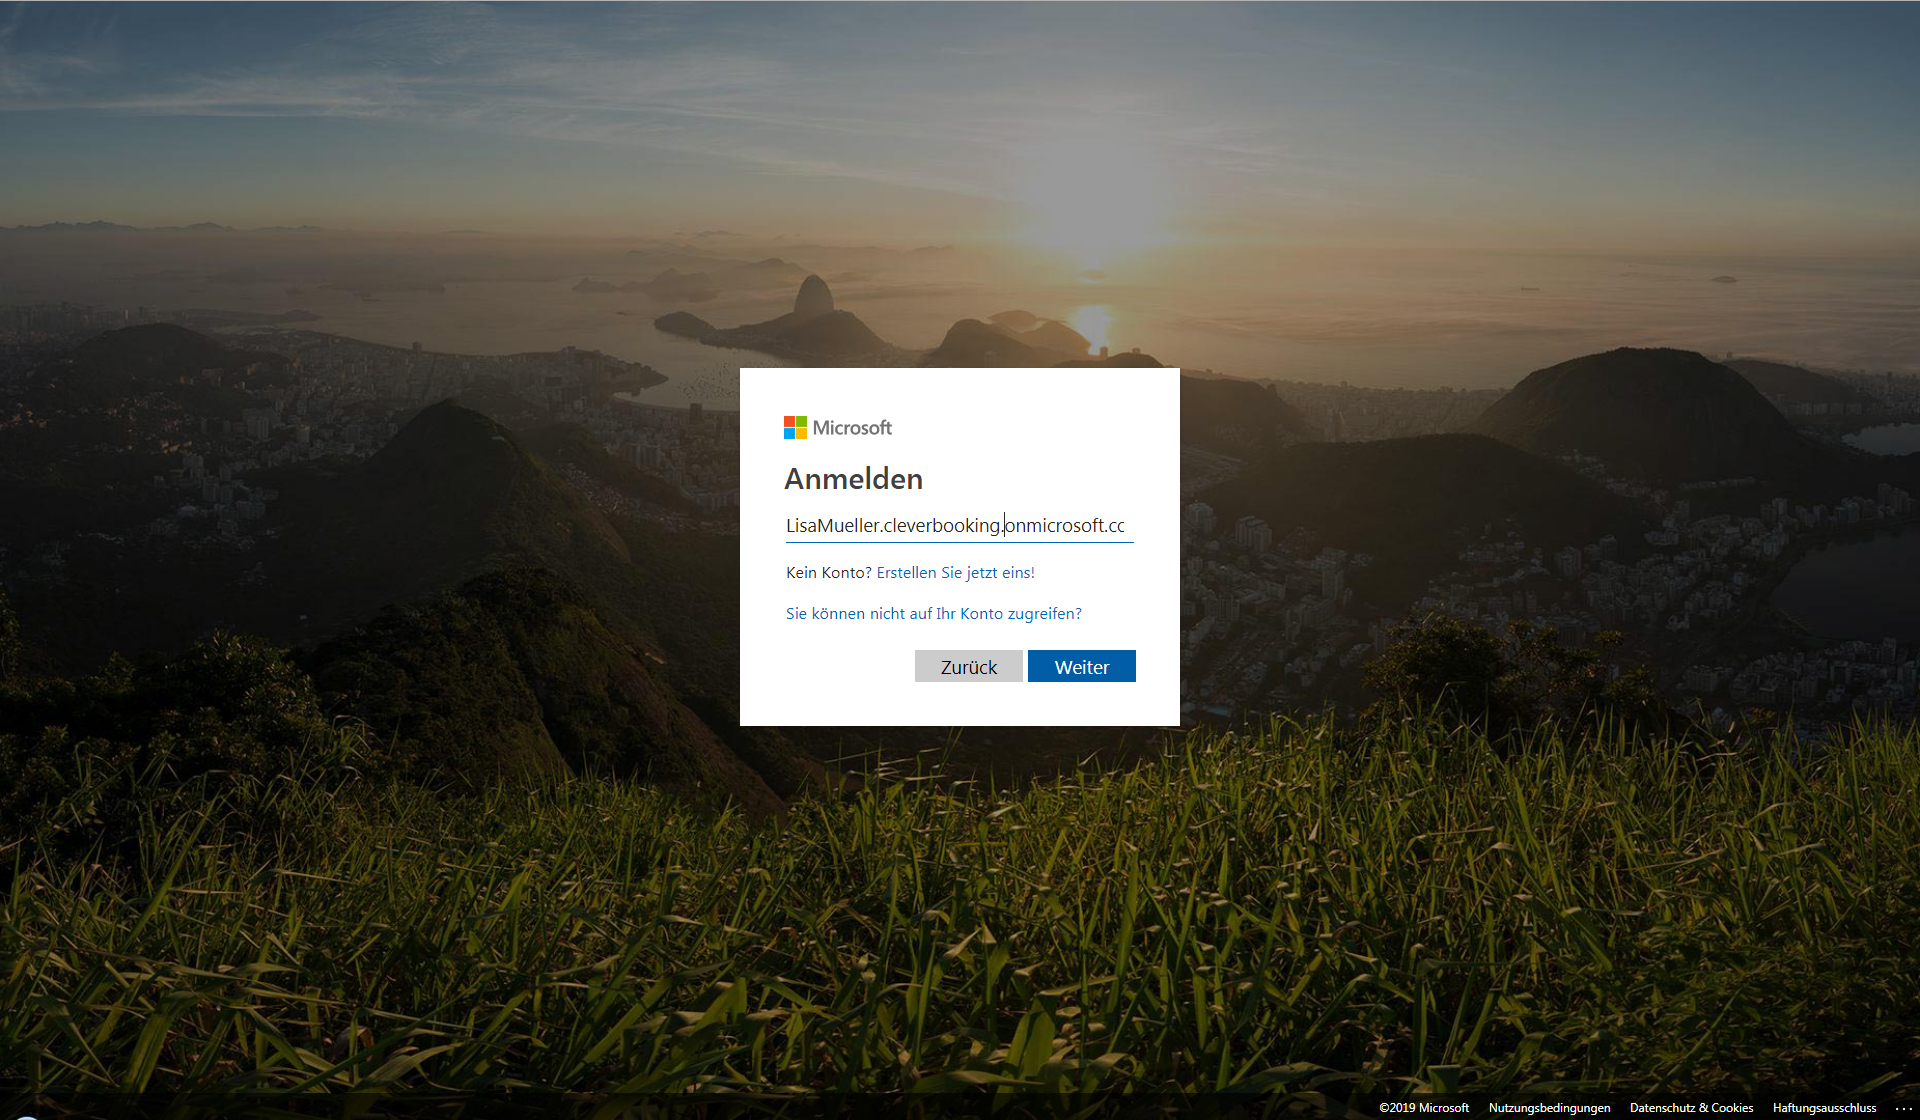
If the link cannot be followed, temporarily deactivate your anti-virus programme > Login to your OneDrive account via the pop-up window > If necessary, grant GetMyInvoices the listed permissions by clicking “Accept”!
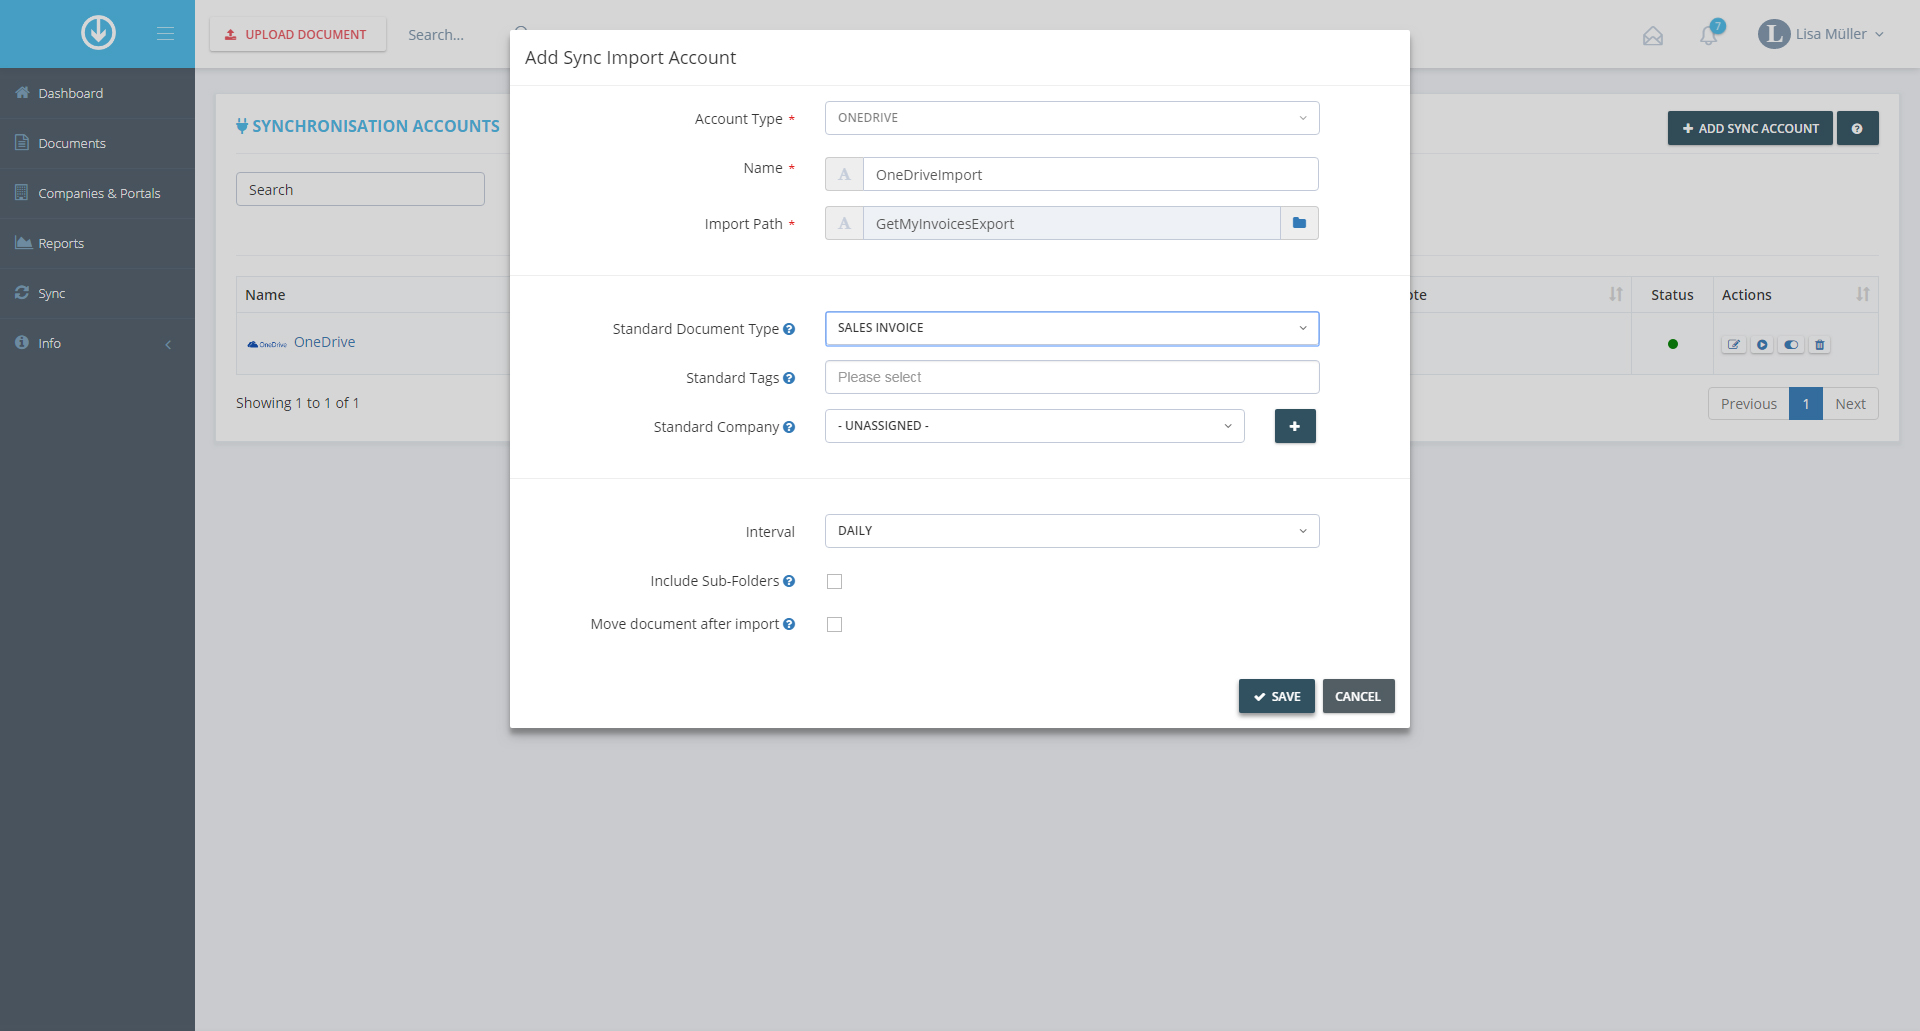
Enter a new name for the account > Under “Import Path”, specify which folder documents should be imported from, and click “Continue” > Fill in the fields “Standard Document Type”, “Standard Tags” and “Standard Company” > Specify the synchronization time interval > If required, fill in the remaining fields > Click “Save”!
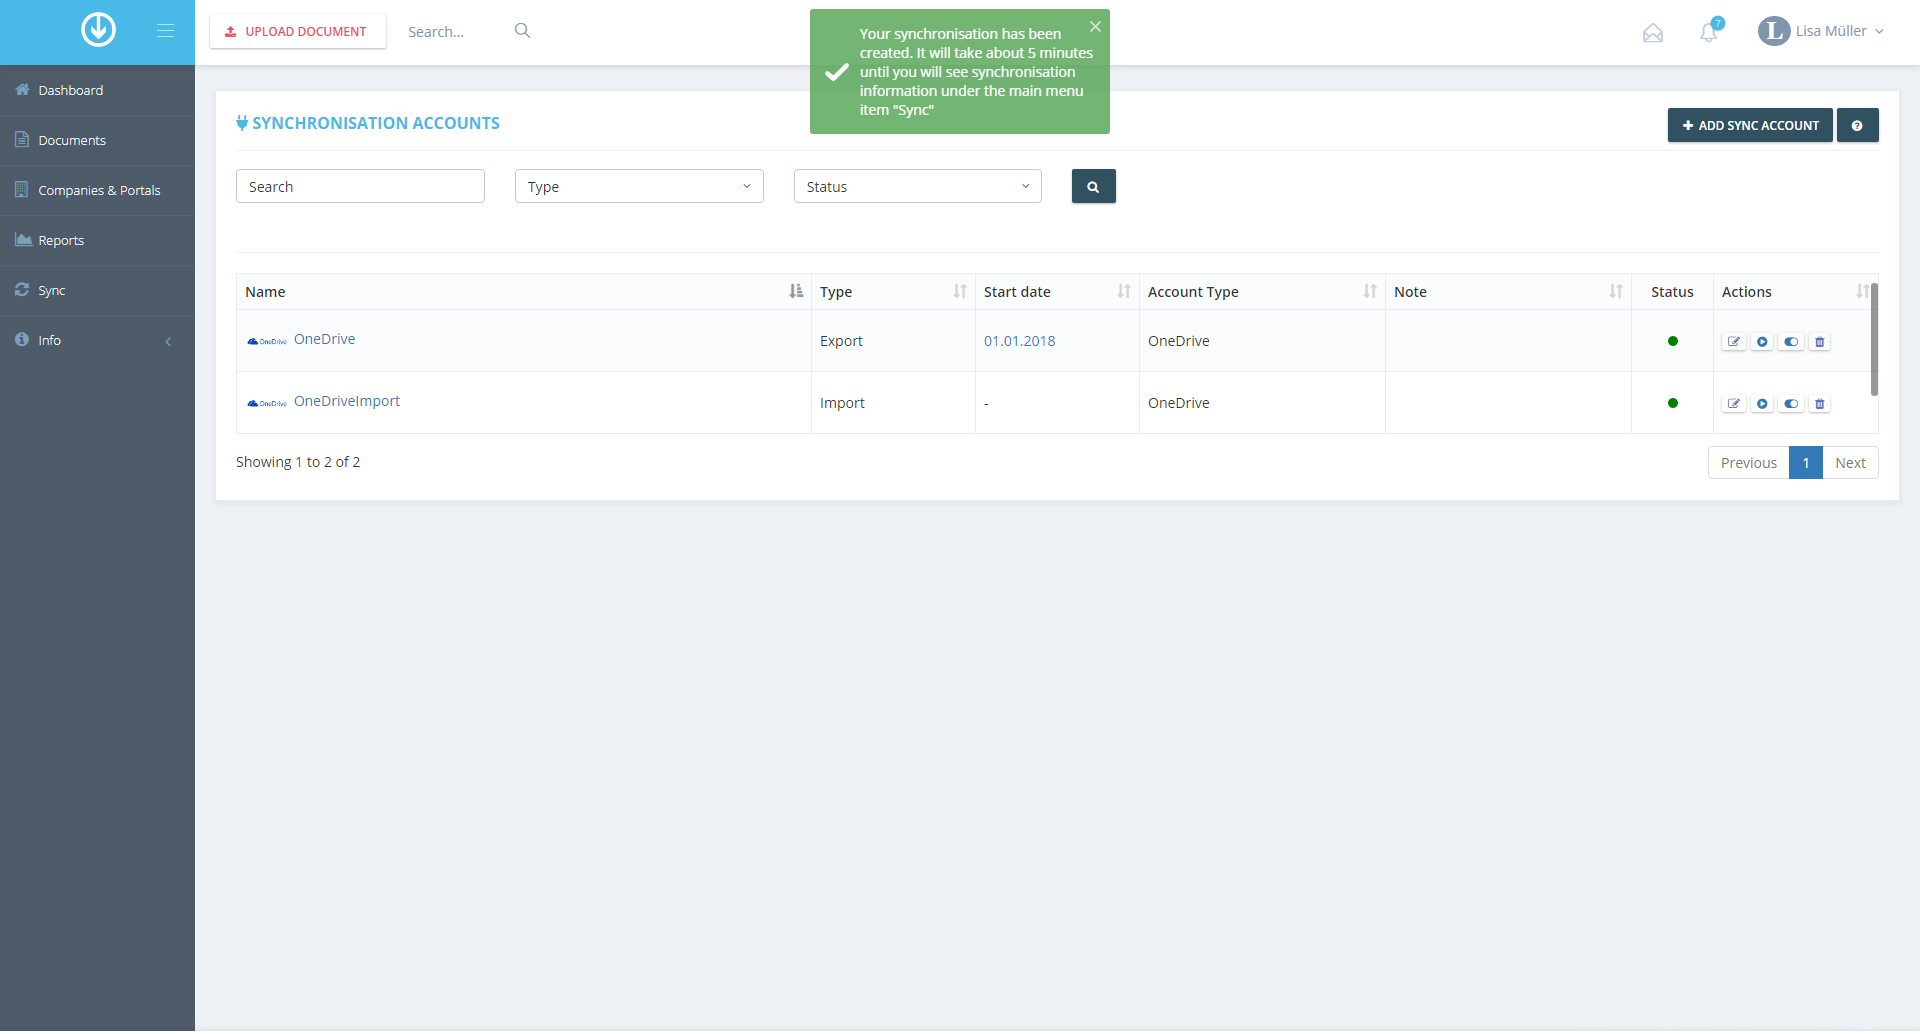
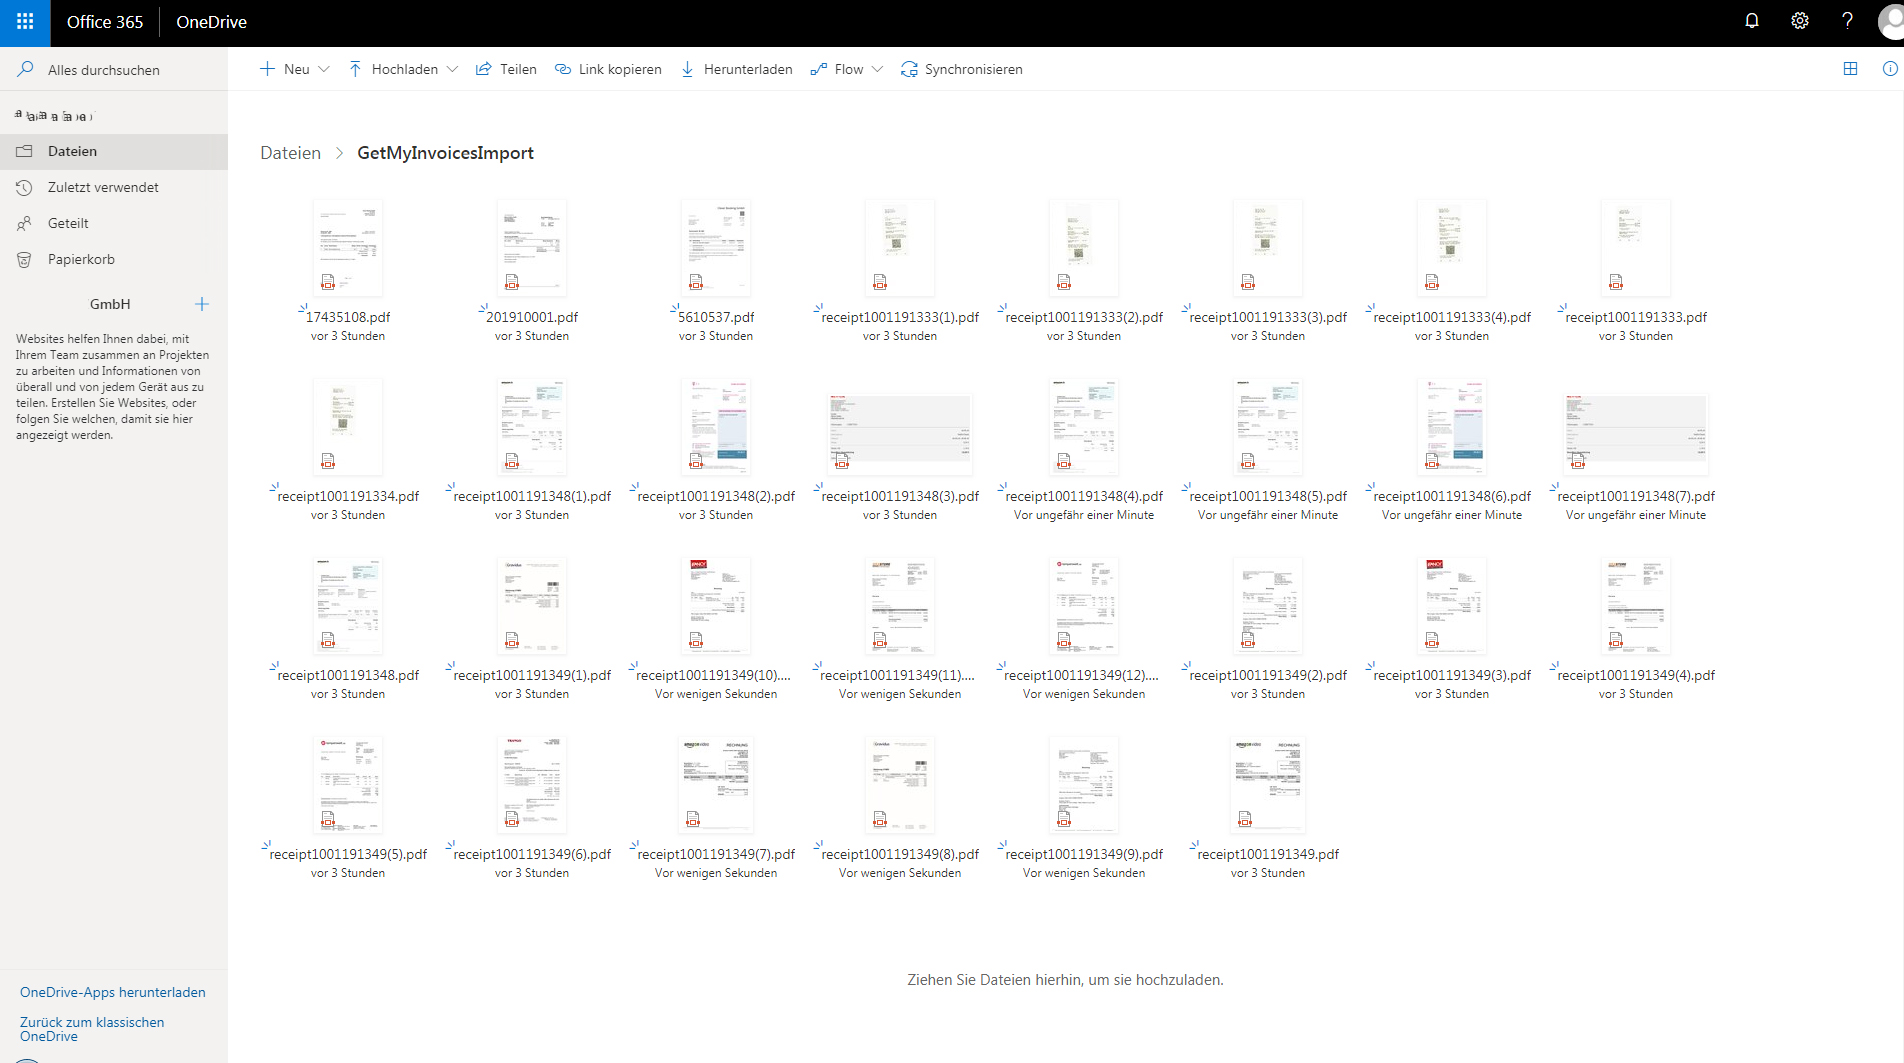
It will only take a short while until you can see the synchronization information under “Synchronization” in the main menu, and later the imported documents. > That’s it!
OneDrive is a file hosting service brought to you by Microsoft. It enables users to upload files into the cloud and to access those from any device and any location. This is possible via web browser, proprietary client applications, or apps. Files are being synchronized automatically. Moreover, files and folders can be shared with other users, too. In combination with Office 365, files can be jointly worked on in real time.
GetMyInvoices automatizes the transfer of files into and out of OneDrive. Users can export documents from GetMyInvoices into OneDrive, as well as import invoices or receipts saved in OneDrive into GetMyInvoices, and forward those from there – depending on how it suits your workflow.